
In today's digital age, your website is the face of your business, and it's crucial to ensure that it's visible to potential customers. Search engine optimization (SEO) is a critical component of any successful digital marketing strategy. One way to boost your website's visibility is to tweak your page settings. In this blog post, we will cover two essential steps to optimize your Webflow website: creating title tags and meta descriptions and adding Open Graph settings. We'll also walk you through updating your project settings to ensure a seamless user experience.
Tweak your page settings
Step 1: Create Title Tags and Meta Descriptions
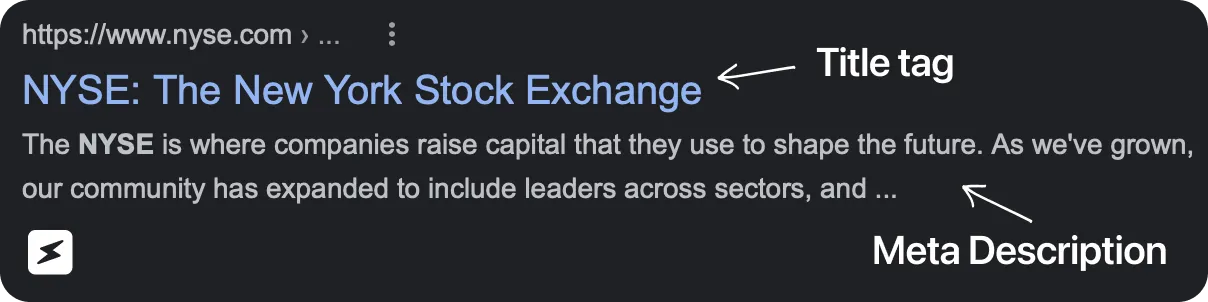
The Title Tag is the first line that people see when searching you or your business up on Google. Setting it up is crucial as that's what the search engine uses to determine what is on your website and how valuable your content is to the user's search. That is why you need to add a title tag for each page, even the dynamic ones (CRM) on Webflow. It is recommended that the Title Tag is 50-60 characters long, has unique content and contains a primary keyword that resonates with your brand.
The Meta Description is used to summarize what your page is about. It is the second thing that the user sees when searching up you or your brand. Google or any other search engine scrapes your Meta Description to further determine what your website, blog post or page is about. It should ideally be between 50 and 160 characters, with the largest possible length amounting to 300 characters.
How to edit the Title Tag?
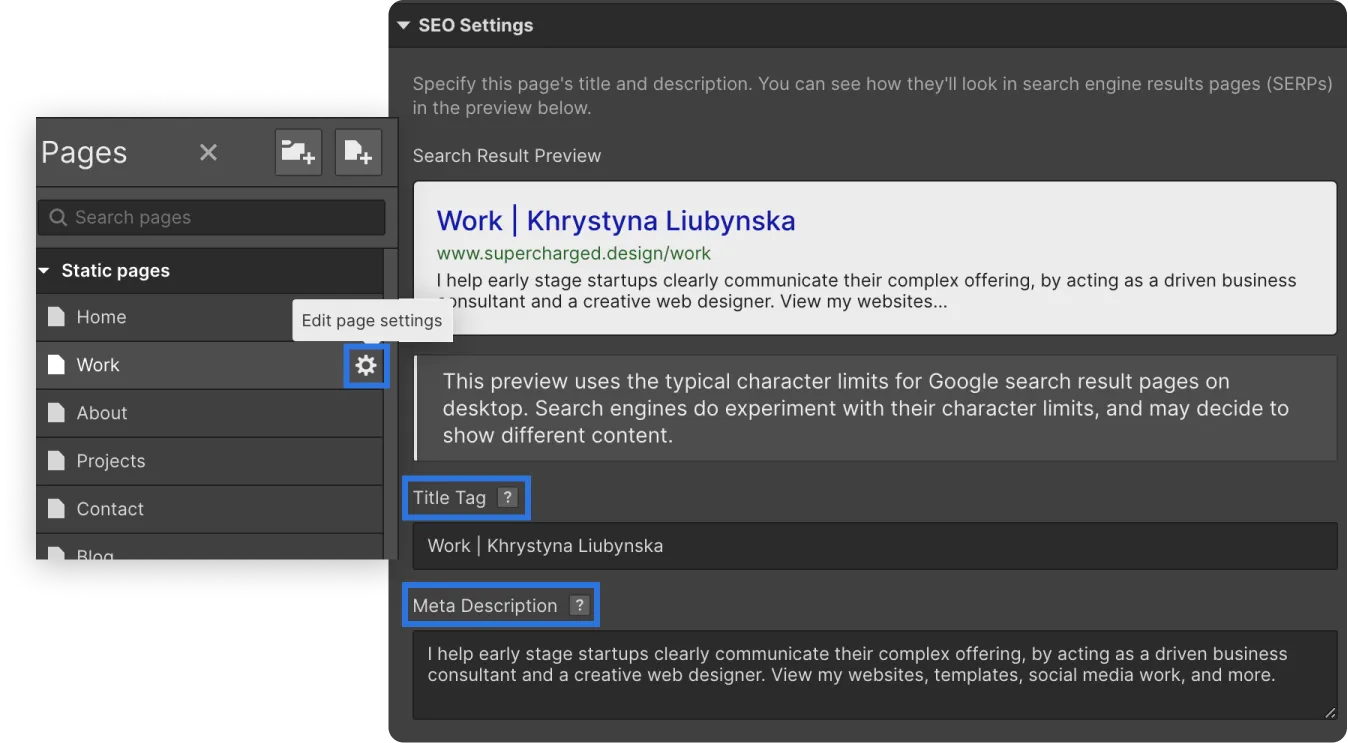
Head over to the Settings of each of your pages and scroll to the SEO Settings. You will see Title Tag in the SEO Settings there.
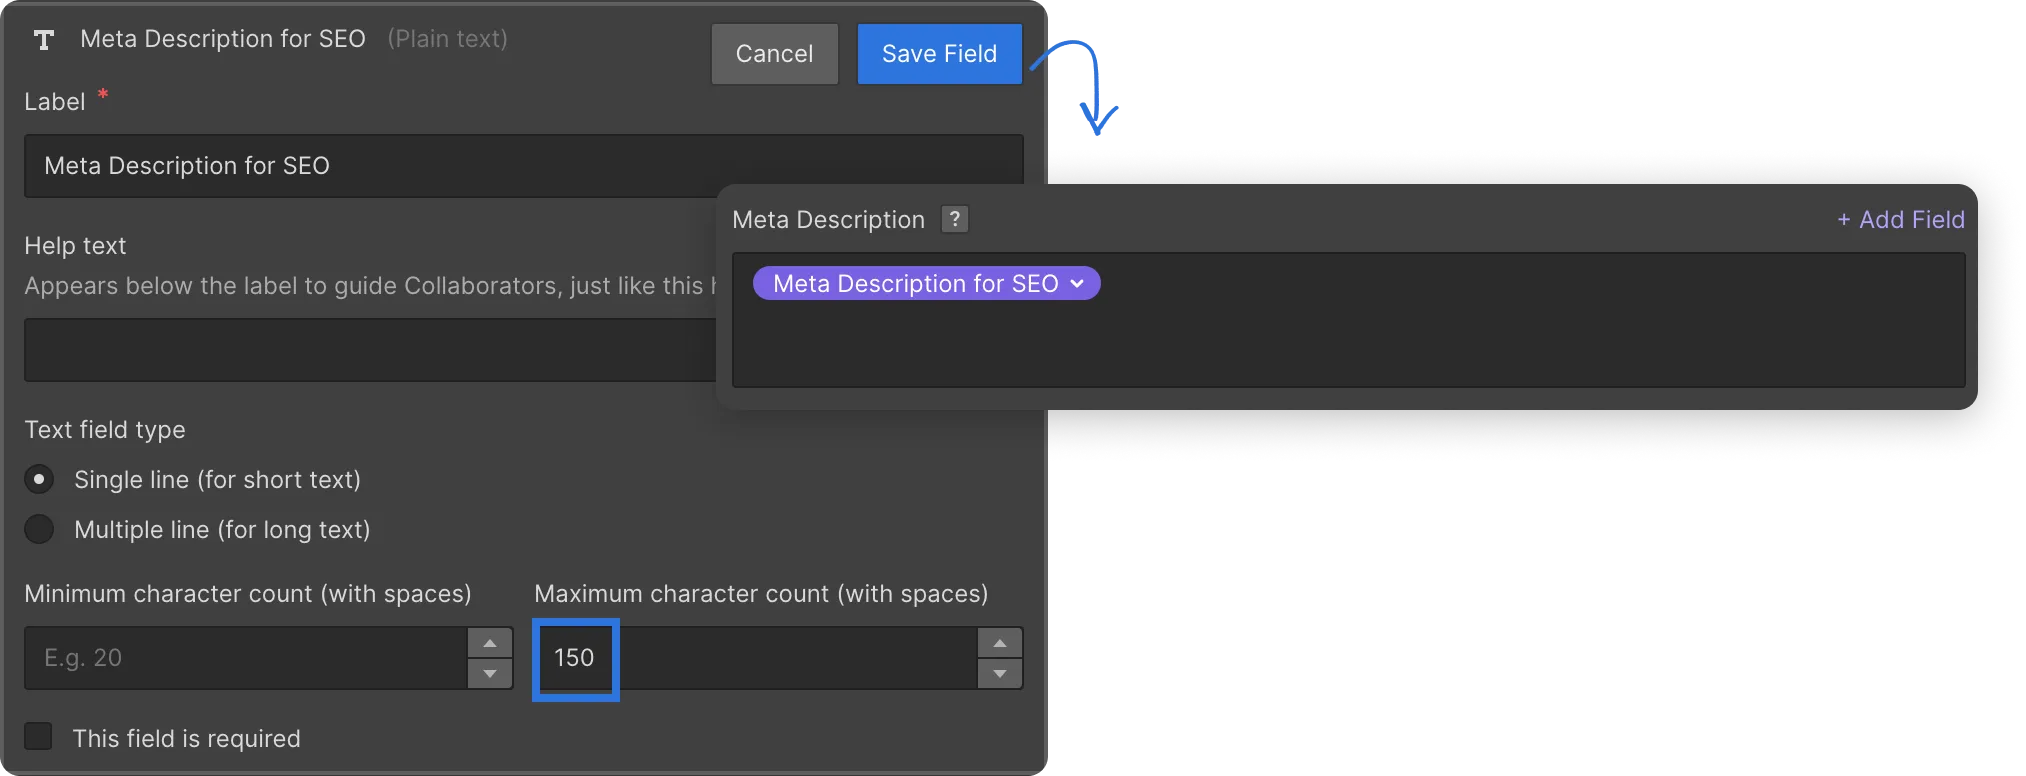
For dynamic pages, it is a little bit more complicated. You first need to go to your CMS Collection and add a new Plain Text Field for the Title Tag. Remember to limit the character count to 60 characters to ensure that you Title tag for the dynamic pages is effective. To bind this new filed to your dynamic page, go to the Settings of your page and click "Add Field" -> choose the field with Title Tag. You can additionally add text after this field (e.g. (Title Tag. Field) | Supercharged Design). If you are doing this, then do not forget to make the character length for the Title Tag in your dynamic item smaller, depending on the length of the second part of your Title Tag.
The next time you create a dynamic page through Webflow's CRM, don't forget to also input the Title Tag for your item and it will automatically sync and show up on Google.

Here is a Title Tag Checklist for you:
- Keep it within 50-60 characters
- Make it unique and relevant to your target demographic
- Try to target your most important keyword (e.g. Fin Tech, Venture Capital, Pharmacy)
- Make sure to add Title Tags for dynamic fields
How to edit the Meta Description?
To set up the meta description you need to do the same exact steps. Go to the setting on your Webflow page and scroll to SEO settings. Under Title Tag, you will see Meta Description.
For dynamic pages, create a new Plain Text Field (just like you did with the Title Tag) and limit its length to 150-160 characters. After you set this up, head to your page's settings and click "Add Field" -> choose the field with Meta Description. When you create a new item in your CRM, do not forget to write out your meta description as well and it will automtically update when you publish your CRM item.
Here is a Meta Description Checklist for you:
- Keep it within 50-160 characters
- Target a speicifc keyword or keyword phrase (e.g. the easiest to clean carpets, the best winter shoes)
- Have a clear call to action (e.g. get it today, find out more, try for free today)
- Make it unique -> check what your competition is doing and make sure that you are differentiating your message and call to action
Step 2: Add Open Graph Settings
In your page settings under the SEO Settings you will see Open Graph settings. You should set it up to ensure that the titles, descriptions, and images of your page represent what it is about for social media sharing purposes. This will also give a boost to the SEO of your website, and just make it more presentable when you share it with others.
To set it up, you first need to create an Open Graph Image. It's recommended size is 1200px by 630px. Once you have created it, upload it to your assets on Webflow, click to view the details of that asset and then click on the "link" icon to open it in a new tab as a separate file. Now all that is left to do is to copy the URL and paste it into your Open Graph Image.
Make sure that this is done for all pages on your website, even the dynamic ones. Follow the meta description and title tag examples above to see how this can be done for the open graph content.
Update your Project Settings
Webflow has made it easy to optimize for a better SEO in your website's project settings. There is a number of steps that need to be taken here, but they are all quite simple:
Step 1: Add a Favicon and a Webclip
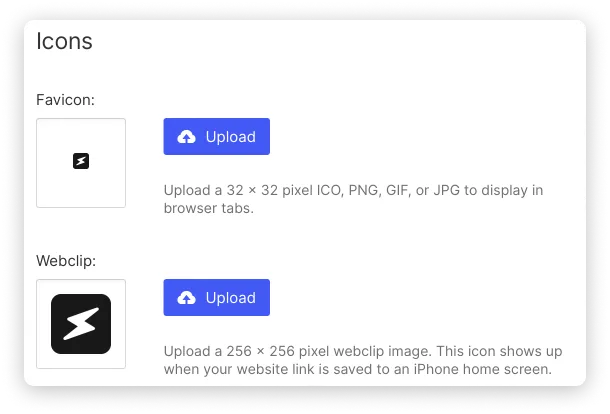
Favicon is the small icon that you can see at the top of your browser tab. Webclip is the icon that appears on your mobile device when you bookmark a website. Both are important for SEO purposes.
To edit them in Webflow, head to "General" tab in settings and scroll to Icons. You will see upload buttons next to both favicon and webclip as well as their recommended sizes that are 32 x 32 for favicon and 256 x 256 for webclip.
Step 2: Assign the language
When you scroll past the "Icons" section in the General settings, you will see a "Localization". There, you should markup the language of your website. Here is a list of all languages and their markups. For english, it's "en", for french it's "fr" and so on and so forth.
This is important, as it helps Google understand which language the content of your website is written in, how it can be translated with Google Translate and who it should be shown to.
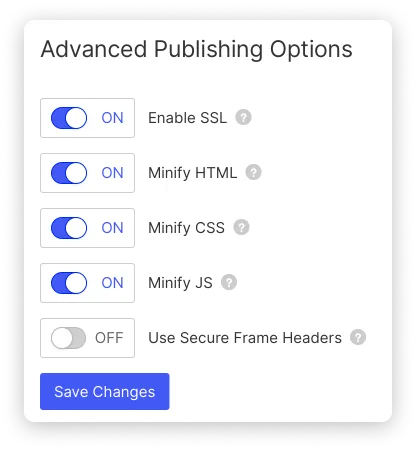
Step 3: Enable SSL, Minify HTML, CSS, and JS
Next, head over to the "Publishing" tab at the top of your settings. When you scroll down, you will see Advanced Publishing Options. There, make sure that your SSL is enables, and both HTML, CSS and JS are minified. Click on save changes and don't forget to re-publish your website.
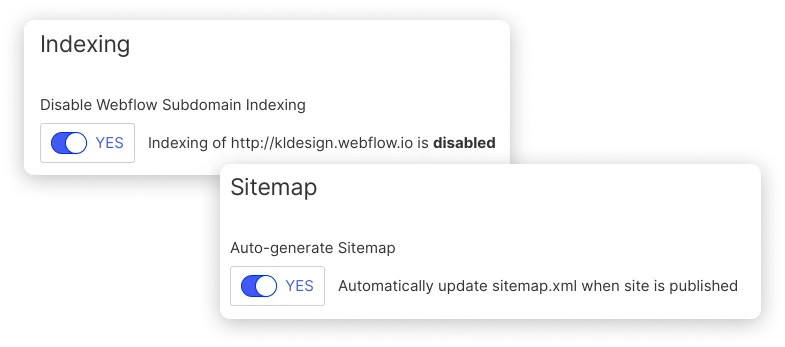
Step 4: Optimize SEO Settings
Click on the SEO tab at the top of your settings page. In the Indexing, make sure that the indexing is disabled for your .weblfow.io subdomain. Now, scroll down to Sitemap and make sure that Auto-generate sitemap is enabled.
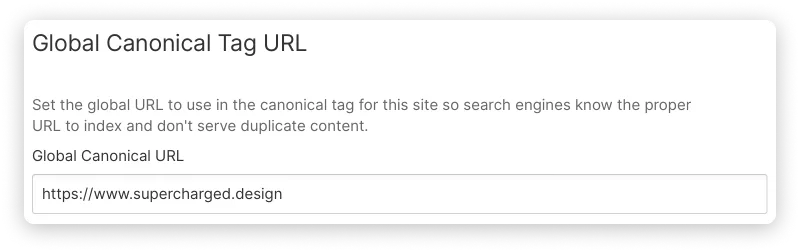
Once this is done, add a Global Canonical URL, which is a simple approach to make it clear to Google which version of a page is the legitimate one. The basic URL of your website (for example, https://supercharged.design) can be included as a global canonical tag, which will be used to produce canonical tags for each page on your website.
Optimize for Accessibility
Making your website accessible is not only a huge boost for the SEO rankings on Google but it is also a useful and valuable option for many people around the world, as some people are temporary, permanently or situationally disabled.
Here is the overview of the steps that will ensure that you website is accessible:
- Test your website on mobile
- Set up accessible typography
- Choose legible fonts
- Limit the width of your text
- Сreate a color contrast
- Keep a hierarchical site structure
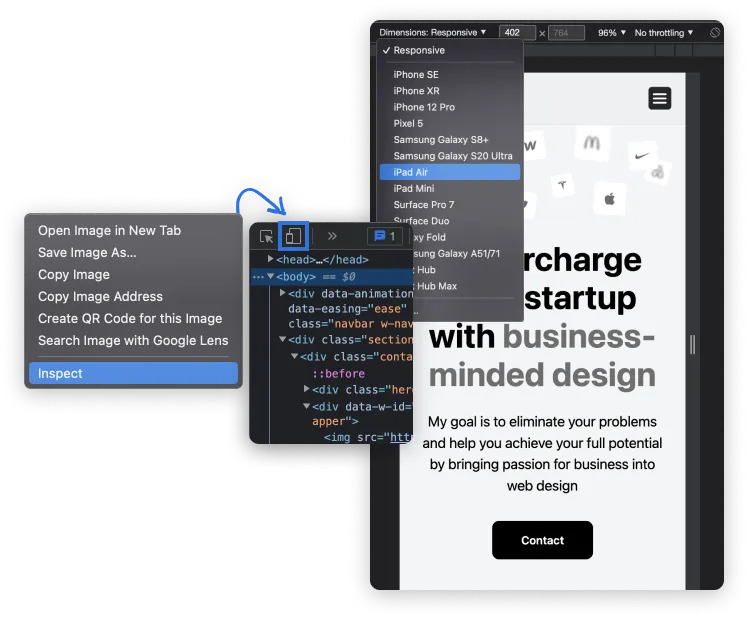
Step 1: Test your website on mobile
Head over to Google Chrome, open your website and click Inspect. From there go to "devices" panel and you will be able to see your website on any device and resolution. You can even select a specific device from the dropdown, making your optimization more efficient. Make sure to especially test every page on 767-320 pixels breakpoint (Mobile).
Step 2: Set up accessible typography
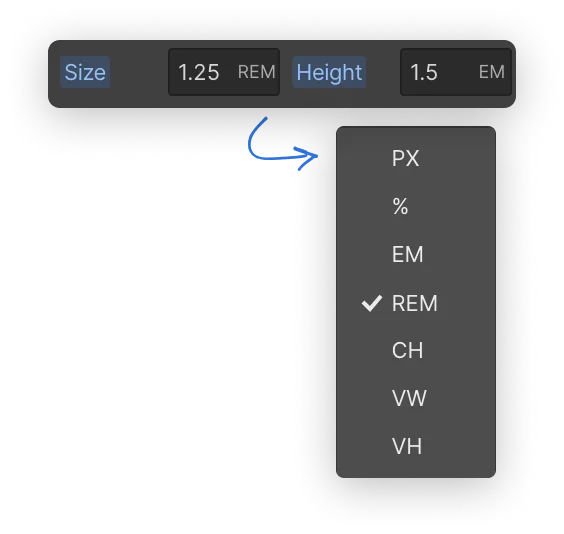
To have your typography fully accessible it has to be set in REMs and not in pixels. Why? Pixels overrides the device's settings, but REMs are responsive and scale based on the settings of an individual device. This means that is someone has an impaired vision and accesses your website, they will be able to see every font in a size that works best for them, without having to strain their eyes. With over 2.5 billion of people suffering from vision impairment (Statista, 2019), this is a must for you website and is not something to skip when working on the SEO.
Similarly, you should set the height of the text in REMs. Ideally, it should be anywhere from 1.3 to 1.7, but it can also be higher, depending on the font you are using. To make this process simpler, you can use an online PX to REM converter.
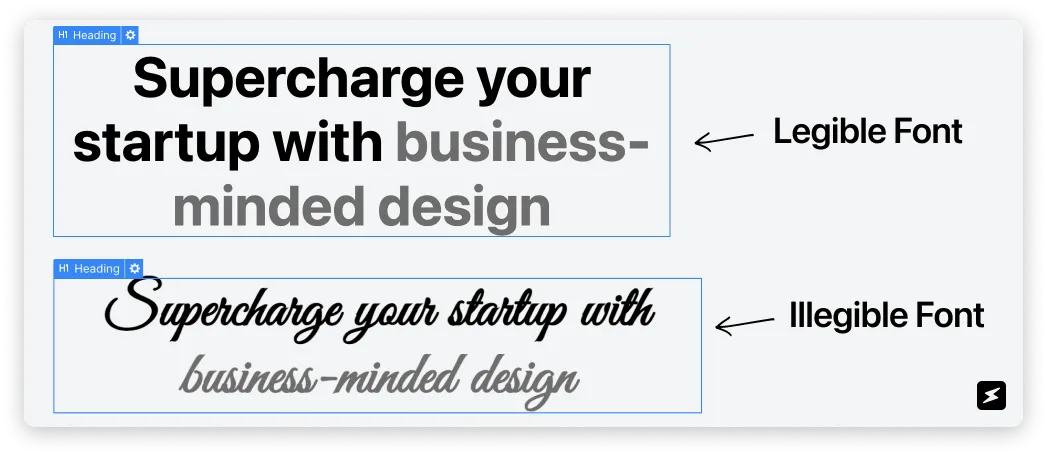
Step 3: Choose legible fonts
This step is a must for any website, because your fonts can either make or break the experience of a user. Highly eligible fonts are easy to read, especially when it comes to these letters: i & l, m & l. Some highly legible fonts include: Helvetica, Georgia, Open Sans, Roboto, Rooney, Lato, Futura.
Step 4: Limit the width of your text
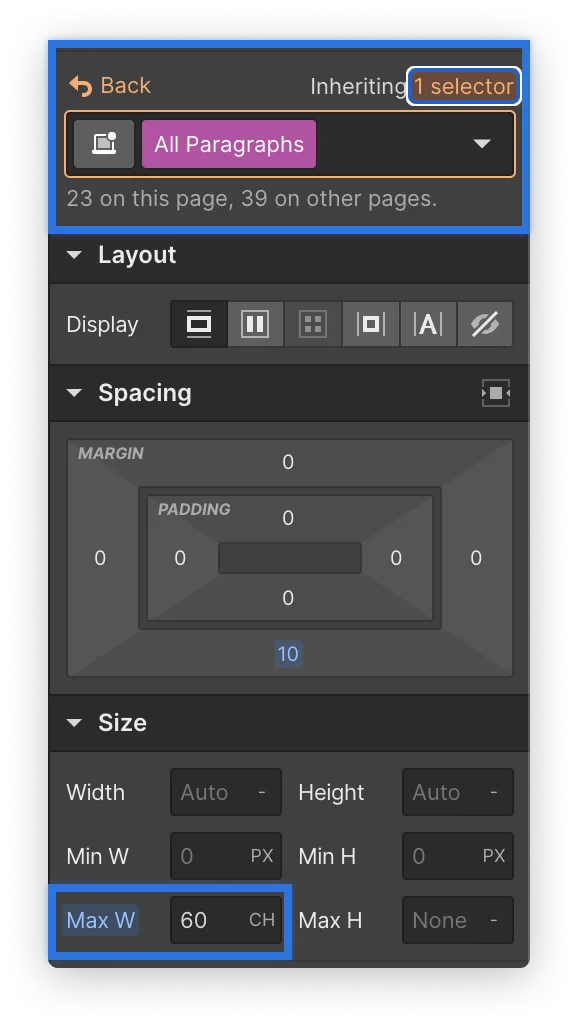
Have you noticed that reading text that has a large width or a very small one can be challenging? You need to make sure that the width of your paragraphs is limited, so that users do not run into this issue when visiting your website. To do that, set a maximum width for your text between 45 and 75 characters (CH). To set it for all of your paragraphs at once, select the global tag "All Paragraphs" and set its maximum width.
Also, to make sure that it is even easier to read, align most of your text to the left with the exception of some headers and smaller paragraphs. This creates an anchor point for your eyes when moving to the next line.
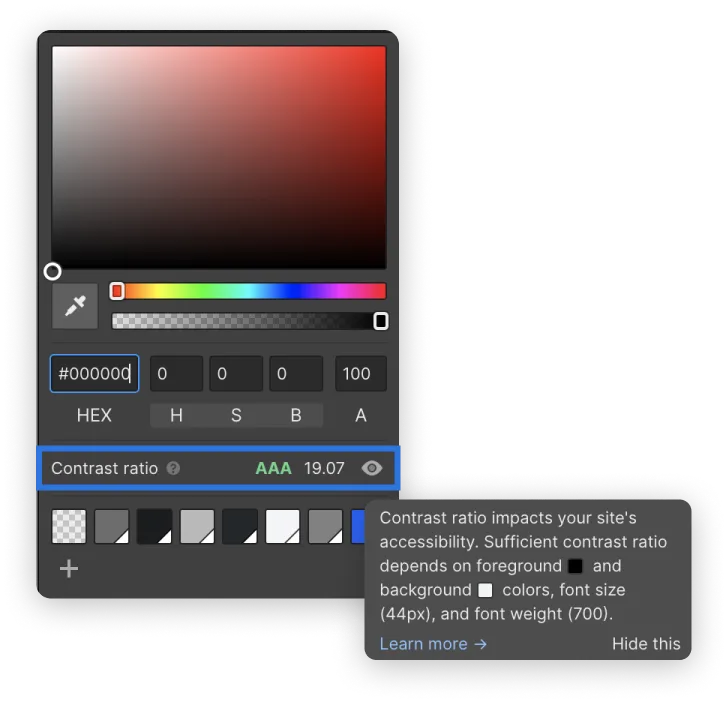
Step 5: Create a colour contrast
When you select a colour for your background, font or any div block, you can see the contrast ratio directly in Webflow. This ratio should be AAA (green) to ensure that anybody can easily access the information on your site.
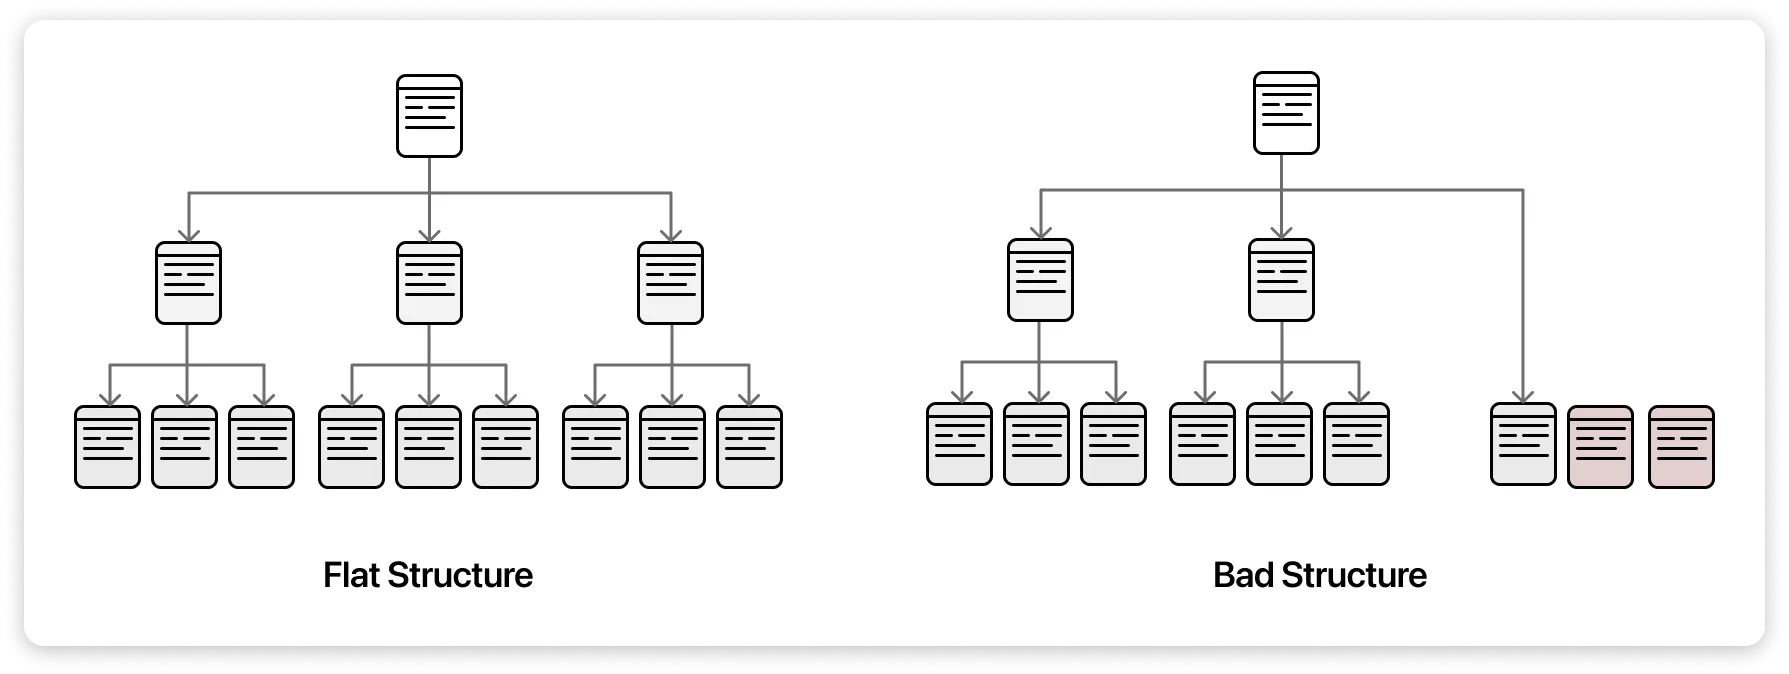
Step 6: Keep a flat site structure
A simple and flat website structure provides the user with the ability to access any page on your site with as few clicks as possible. This structure has to be hierarchical and make sense, so that both the Google Search Console can index and analyze it and a website user can conceptualize it in a short span of time. Start with your most important pages and move to the least important ones.
You can draw the whole user flow of your website on a piece of paper or write it out in your notes: whatever helps you to visualize it and pin point potential issues. With this method, you will also be able to spot any orphaned pages that are not linked to anything. To check whether you have any such pages, go to website broken link checker or install a plugin that does that for you.
To further help a search engine index your website and the users to better comprehend it, create a section with your sitemap. It can be implemented as a footer or as a completely separate page. This will ensure that you have everything in one place and no page on your website is stand-alone.
Depending on the type of website you are building, it might make sense to have breadcrumb navigation, which is another great tool to both boost your SEO and help the viewer navigate through each page.
Step 7: Use semantic tags
Semantic tags are something that most Webflow users miss, but it is such an important accessibility-related feature. They were added as part of HTML5 to clearly define what each of the website's element is about. In Webflow, you can specify these HTML5 semantic tags:
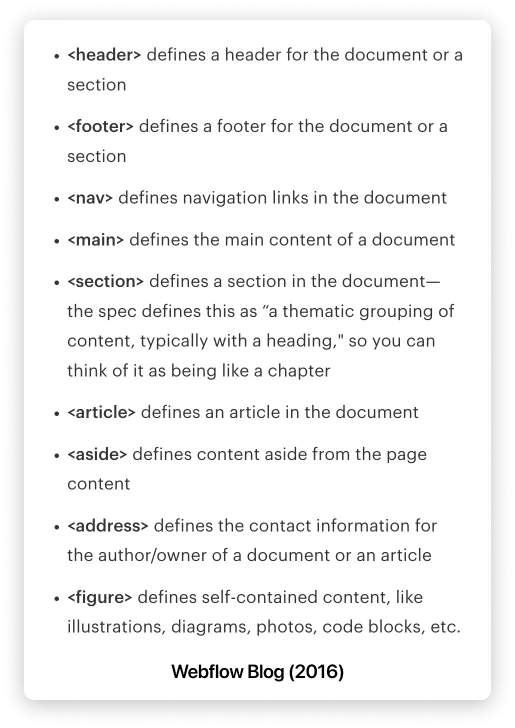
Each tag can be specified on the right panel -> Settings -> Tag.
Even if your element is a section block or a navigation block, it will not always be accompanied by a tag, so you should check the tags of these elements once you are in the finishing stages of you project. To read more about semantic tags, head over to Webflow's blog post about this feature.
Learn more about accessibility and see a comprehensive guide by heading over to Webflow's accessibility checklist.
In conclusion, optimizing your website's page settings is an essential step to boost your website's SEO and increase your website's visibility. By creating title tags and meta descriptions, adding Open Graph settings, and updating your project settings, you can improve your website's search engine ranking and attract more potential customers. Follow the steps outlined in this blog post, and you'll be on your way to a successful digital marketing strategy.

.webp)

